Replicating a CMM-Based Inspection Process
InnovMetric Software replicates a CMM-based inspection process using a 3D digitizer and PolyWorks®
Today, manufacturers in the automotive and aerospace industries use a touch-probe CMM technology for the inspection of parts, castings, molds, etc. This inspection process has proven to be remarkably accurate and reliable over time. Yet it has also proven to be time consuming and relatively expensive.
The emergence and development of the 3D digitizing technology has recently opened the door to many new applications in the automotive and aerospace industries. The latest ground-breaking innovation in the inspection and quality control world is the capability to replicate a series of measurements, traditionally obtained by various tools such as physical gauges and CMMs, using a 3D digitizer and a high-density, point-cloud inspection software.
Since 2000, InnovMetric Software offers PolyWorks|Inspector™, a powerful software solution that uses high-density point clouds to control the quality of castings/dies/molds, and to approve manufacturing processes through prototype, first-article, manufactured, and assembled parts inspection. PolyWorks|Inspector offers a complete toolset for comparing forms and profiles (part-to-part and part-to-CAD), and includes complete GD&T analysis capabilities, as well as a wide array of soft gauging tools (Linear, Radius, Flush & Gap, Thickness, etc.).


The Challenge
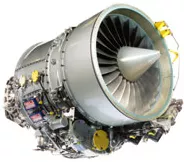
InnovMetric was asked by world-leading jet engine manufacturer Pratt & Whitney Canada to replicate a traditional part inspection using PolyWorks and a 3D digitizer instead of a traditional coordinate measurement machine (CMM). InnovMetric’s applications engineers, along with the development team of Pratt & Whitney Canada, conducted a typical inspection of a diffuser pipe to evaluate the quality of the results obtained with PolyWorks and to compare them to those obtained with a CMM. The experiment successfully showed that PolyWorks can provide accurate results in a fraction of the time of a regular probe-based process.
The Solution
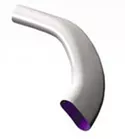
For this specific test, a typical inspection with the PolyWorks|Inspector software solution was conducted using a diffuser pipe (a part found inside a jet engine that delivers pressurized air from the compression system to the combustion chamber). “PolyWorks acts as a virtual CMM that probes points on the point cloud instead of on the physical part. This approach allows quality-control specialists to collect tens of thousand of points, and therefore base their analysis on a richer and more complete source of information,” stated Marc Soucy, President of InnovMetric Software Inc.
The test was conducted in the following five steps:
A) Data Acquisition:
Step 1. Acquiring the data
The diffuser pipe was digitized with a 3D digitizer. A high-density point cloud was obtained, providing a rich source of information to quality-control specialists.
B) Processing the point cloud with PolyWorks:
Step 2. First alignment and global comparison
- The point cloud obtained from the digitizer is aligned to the CAD model using a global best-fit alignment method
- The point cloud and the CAD model are compared to obtain point-to-CAD deviations and generate a pass/fail report
Step 3. Second Alignment
To replicate the CMM alignment, a 3-2-1 alignment is performed using specific features (plane, vector, and origin point) extracted from three cross-sections.
Step 4. Measurement and Comparison
GD&T programming techniques and cross-sectional analysis are used to obtain four dimensional measurements at 16 cross-sections:
- Area Measurement (from cross-sections)
- Bow Displacement (GD&T)
- N Angle (GD&T)
- Max Deviation (from cross-sections)
Step 5. Report Generation
A complete report including color maps, spreadsheets, and annotated snapshots is generated. The report is then exported under several file formats, including ASCII, AVI, Excel, HTML, VRML, and Word.
PolyWorks|Inspector™ reduced the inspection time of a diffuser pipe by more than 75%, while maintaining the accuracy and precision of a traditional CMM!
The Benefits
PolyWorks’ most noticeable features for this experiment:
-
Cross-sectional analysis
Global comparison between digitized points and a CAD surface is a powerful tool to help visualize complex deformations introduced by manufacturing processes. However in most cases, a global color map is insufficient for accepting/rejecting a part, as the function of a part generally depends on a list of specific dimensions. In the case of the diffuser pipe, the evolution of the cross-sectional area along the pipe center line is the most critical property that determines if the part is acceptable or not. Many acceptable diffuser pipes could be wastefully rejected if a global point-to-CAD deviation was the sole criterion being considered in the inspection process.
-
Geometric Dimensioning and Tolerancing analysis
A unique aspect of PolyWorks|Inspector is its feature-based measurement process in which each programmed measurement has its own user-defined tolerances. In this project, PolyWorks|Inspector’s GD&T tools are used to define relationships between nominal CAD features, the measurements that need to be made, and specific tolerances for each measurement. GD&T objects automatically compute real dimensions on the point cloud, and intelligent tolerance-based pass/fail reports are generated.
-
Powerful macro programming language
Analyzing data obtained from the CMM is usually a time-consuming task. To obtain the various measurements, the data is loaded into various software and other operations must be performed manually. Each operation has to be repeated for every new part.
With PolyWorks, a series of measurements can automatically be performed using the advanced macro programming language. For this specific experiment, one of InnovMetric’s application engineers took less than two days to develop macros to automate the entire inspection process. As a result, engineers could execute a complete point cloud inspection, from the first alignment to the generation of complete reports, in less than 3 minutes, with just one click of the mouse.
Conclusion
Based on the 10% rule, preliminary results are acceptable since the difference between the scanner results and the CMM results are below 10% of the part tolerance value. A gage R&R (repeatability and reproducibility) test can now be performed to further validate these results.
Summary
Objectives of the experiment
-
Replicate a traditional CMM-based inspection process using a 3D digitizer to capture points, and PolyWorks to process the data set
-
Evaluate the quality (accuracy) of the measurements obtained with PolyWorks by comparing them to those obtained with a CMM
-
Evaluate the time for completing the inspection of a part using PolyWorks
-
Validate the possibility of success of a gauge R&R (repeatability and reproducibility) test
Approach
-
Digitize a diffuser pipe with a high-density laser-based digitizer
-
Load the data point cloud into PolyWorks and align it to the original CAD model using the IMInspect module
-
Automatically extract four measurements on 16 cross-sections using PolyWorks’ preprogrammed GD&T tools and cross-sectional analysis capabilities
-
Generate complete reports including color maps, annotated snapshots, tabular reports, and animated reports in AVI format
-
Develop macros using PolyWorks’ scripting language to automate the entire inspection process
Results of the experiment
-
Measurements obtained with the 3D digitizer and PolyWorks are very similar to those obtained with the CMM. The deviations between the two sets of results are under 10% of the part tolerance value.
-
Inspection of the diffuser pipe in less than 25% of the time with a 3D digitizer and PolyWorks as compared to the traditional CMM-based inspection technique:
• Data acquisition with a 3D digitizer in only 15 minutes instead of 1 hour with a CMM
• The point cloud inspection process completed in less than 3 minutes using the completely automated inspection features of PolyWorks